 There's quite a chasm between the sudden hankering for cake and baking one. A chasm consisting of finding a recipe, checking you have ingredients to hand, deciphering the recipe and summoning the motivation to tackle the various techniques and steps (my mum says that for her the most dreaded sentence in any recipe is ‘cream the butter and sugar’ to which she always answers “no. I will not be doing that” before slamming the cookbook shut.) Too often you might find yourself making do with nibbling on some cooking chocolate instead.
What if I told you that you could make a delicious cake without much bother? 15 minutes hands on at most. No creaming butter and sugar. A cake whose recipe is essentially distilled down to 2 steps. A cake that is so forgiving that if you undercook it, you're left with blissfully rich and gooey fondant in the centre of the cake. And if you overcook it, the middle stays miraculously decadent while the outside develops a delicious crunch. Still on the fence? Look at my photo of the cake. See all those pretty hazelnuts and toffee shards? That's not because I'm fancy, it's because the entire middle of my cake collapsed 25 mins into baking, leaving a solid rim around the perimeter. My cake resembled a crater volcano. This could've been caused by several things. However, it was still delicious, and it didn't look or taste like a mistake at all! In a nutshell it's this: separate egg whites and yolks. Mix the yolks with all the other ingredients, then whip the egg whites and fold it into the cake batter before baking for about 40 mins. Try it. It will become a family favourite, I guarantee.
0 Comments
 Confession time: I don't think I've ever managed to leave a country town or weekend market without buying a jar of preserve. Chutney, mustard, jam, I am powerless to resist.
The undisputed Australian champion of all jarred preserves has to be lemon curd, aka lemon butter. And as it's peak lemon season right now, I need no further excuse to make a batch of curd myself. I'm sharing my trusty old reliable recipe that I've been using for lemon and passionfruit butter for decades. Its exact provenance is lost but I can tell you it's a combination of recipes from the CWA, my time in the Ritz Carlton pastry kitchen, and personal tweaks I've made over the years. 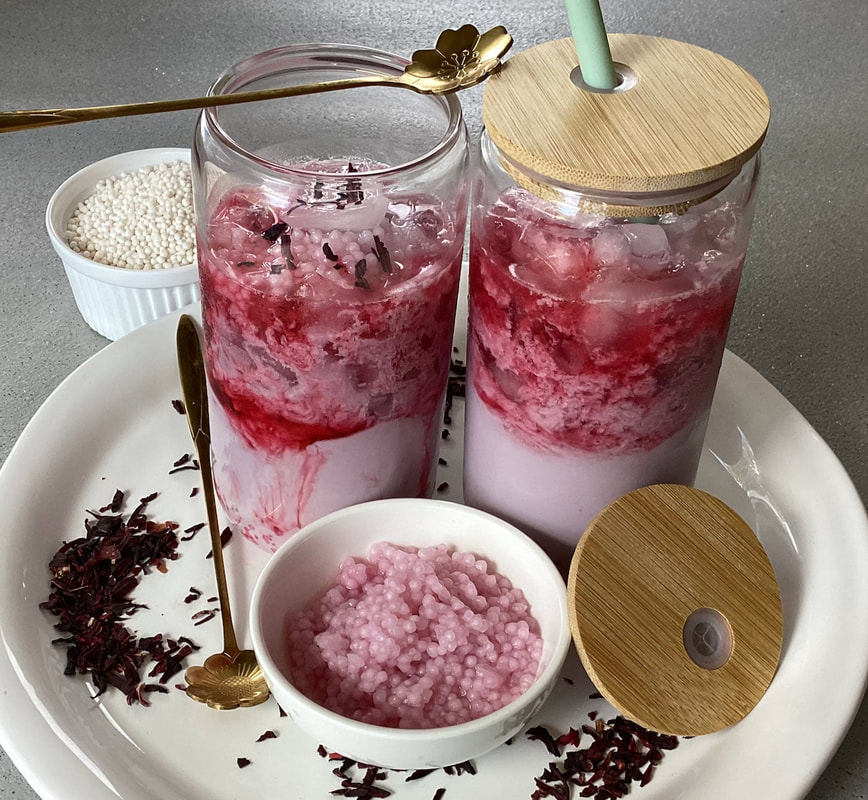 When our Tapioca Pearls arrived in store before Christmas, I set myself the challenge of making Boba, aka Bubble Tea from scratch. Why was it going to be a challenge? Because traditionally the bubble tea you buy already made uses the larger tapioca pearls, whereas we stock the tiny ones. I wasn't sure it would work. I'm pleased to report back that it does indeed work. The process was straightforward and fast. So I encourage you to give this deceptively simple drink a go. Prep Time: 5 min, Cook Time: 10 min, Chill time: 1 hour Servings: 2 Ingredients: ½ cup uncooked tapioca pearls 4 cups water (for cooking tapioca pearls) 4 teaspoons dried hibiscus flowers 1-2 tablespoons sugar of choice 1 cup hot water (for steeping tea) milk of choice ice Method: Bring 4 cups of water to a boil in a saucepan. Slowly add the tapioca pearls. Bring water back up to a simmer and cook for about 10 minutes, stirring occasionally so pearls don't clump together. Scoop a few pearls out with a slotted spoon to test for softness - they should be soft but with a little chew, a bit like pasta. Tip the cooked pearls into a colander in the sink and run plenty of cold tap water over them straight away so they don't cling together, and also so they stop cooking. Set aside. Meanwhile, pour 1 cup boiling water over dried hibiscus flowers and sugar; stir well then let steep for 10 minutes. Strain, stir again then allow liquid to completely cool in the fridge before making your drink. To assemble your Bubble Tea: Divide tapioca pearls between two tall glasses. Add ice and sweet hibiscus tea mixture evenly into both glasses. Add a splash of coconut milk or any other milk you fancy. Add a parfait spoon to help scoop up those plump tapioca pearls. Stir and enjoy! Pimp My Recipe Whilst I used hibiscus tea for this recipe, Bubble Tea is traditionally made with a base of black tea and fruit syrup. If you want to try the black tea version, use black tea in place of hibiscus leaves, and add fruit flavoured syrup or cordial instead of the sugar. Adapt the separate components of this recipe to your taste. The strength of the tea, the sweetness, and amount of milk and pearls. Milk: I tested this recipe with regular full cream milk, oat milk and coconut milk, and they all passed the taste test. However if you want to turn the authenticity up a notch, try using canned evaporated milk. It's what's traditionally used in a lot of commercial bubble tea shops. 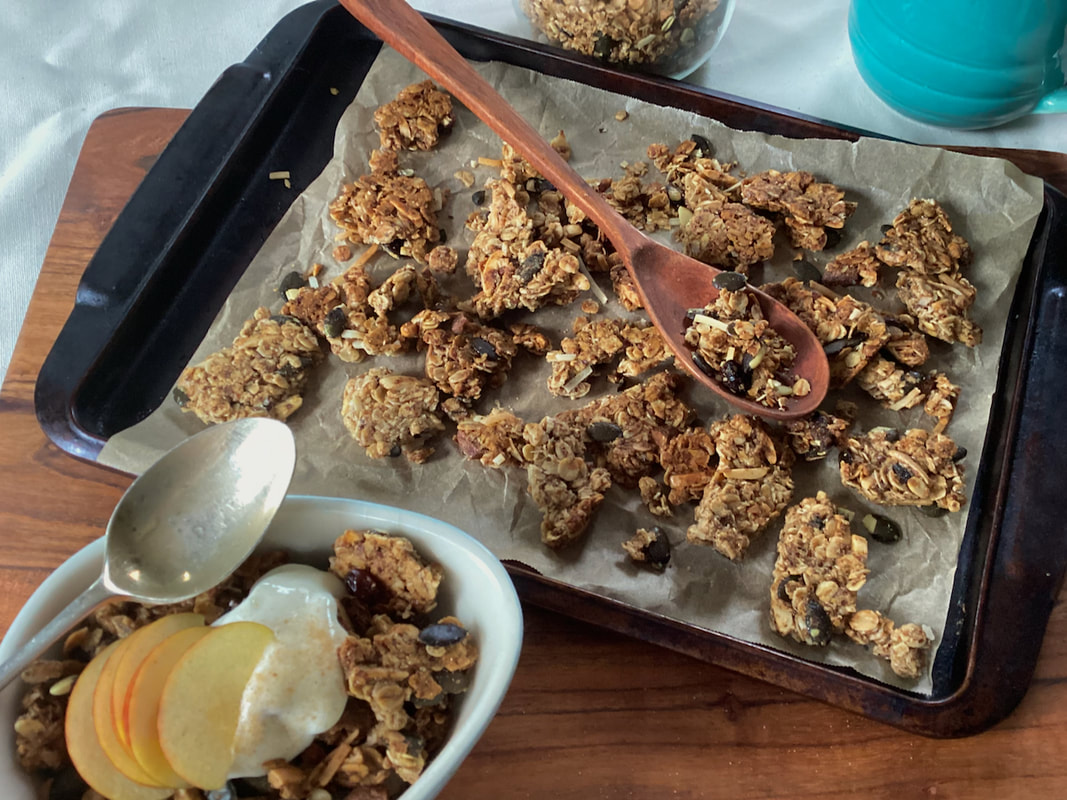 I love convenience in the morning. Even better when it's a decadent yet healthy convenience that comes in under budget!
Have you ever pondered one of life's age-old questions - what is the difference between granola and muesli? You are not alone. The quick answer is this: Muesli and Granola tend to feature the same ingredients, but they are prepared differently. Muesli (both the raw and toasted type) & Granola are all made up of a combination of oats, seeds, fruits and nuts. Raw muesli is enjoyed in its natural state, while toasted muesli is oven baked til a little crunchy. Cold or warm milk is added, plus sometimes yoghurt and fresh fruit. Granola goes a step further, in that: it has some oil and sweetener added, and then it's baked; the fat and sugar help the mixture turn into crunchy clusters of deliciousness. In this recipe, we also add almond meal to help bind the granola clusters together. Ready-made granola clusters aren't the cheapest thing to buy. Sure, they're truly yummy, but when you have a kid who can eat half a box in one sitting, you're suddenly motivated to seek out wallet-friendly alternatives! I always assumed granola clusters would be trickier to make than regular toasted muesli, but yay, I was wrong! This granola recipe takes minimal time and cost to make, and you can tailor the ingredients to suit everyone. What I especially love about this granola is the option to break it into bite sized morsels to be enjoyed with milk, or leave it in bigger shards, making it a portable breakfast on the go. And if you want to dip it in your morning cuppa, you'll get no judgement from us! 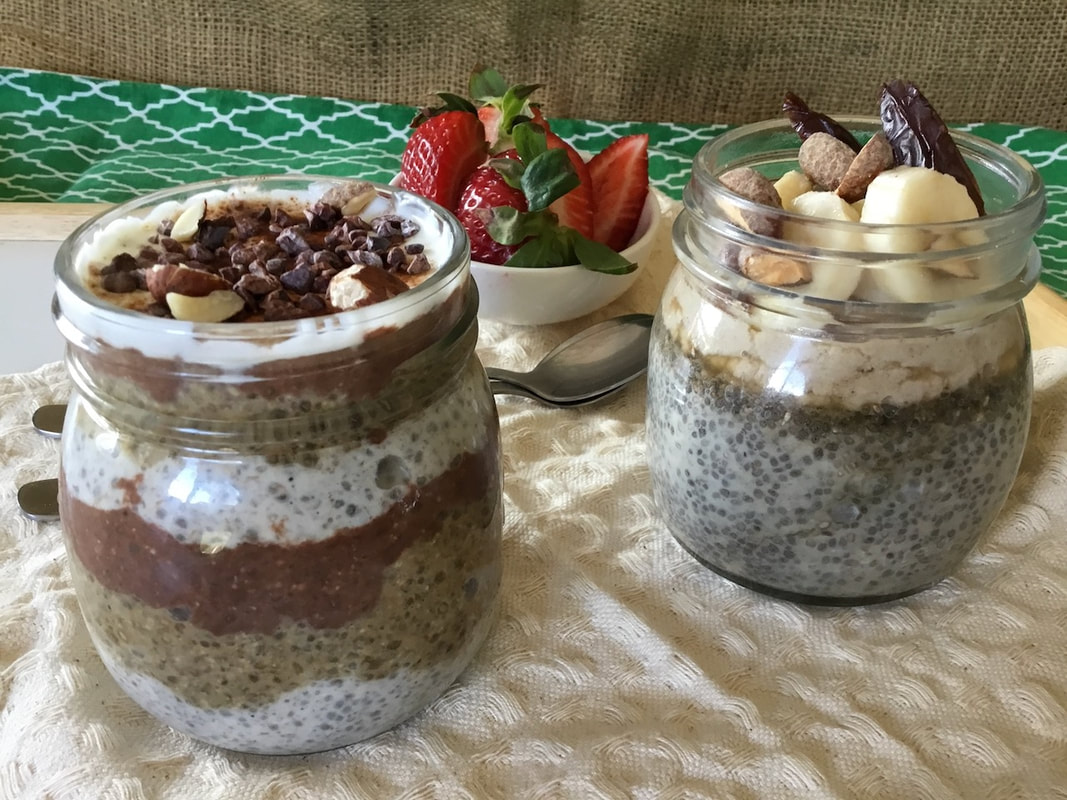 Springtime is rushing past & summer is right on our doorstep! So stock your fridge with wholesome, filling, delicious chia puddings. When you're too hot to even contemplate toast for breakfast or you get a craving for an afternoon or late night sweet treat, chia pudding has got your back.
The humble chia pudding is a good reminder that sometimes mixing 2 or 3 simple ingredients together produces something far grander than the sum of its parts. The soluble fibre in chia seeds makes it turn jelly-like when it's left to soak in liquid. Simply adding chia to milk and adding some flavourings produces the most delicious breakfast, dessert or snack with only a few minutes preparation. I've provided a recipe for a basic chia pudding, plus 2 variations. Play around with different add-ins and toppings to come up with some more variations! Note that the recipe makes one single serve, so just double or quadruple the recipe if needed. I like to make 3 or 4 at a time so I have a few days worth of yummy breakfast or snack. |
Categories
All
Archives
January 2024
|
 RSS Feed