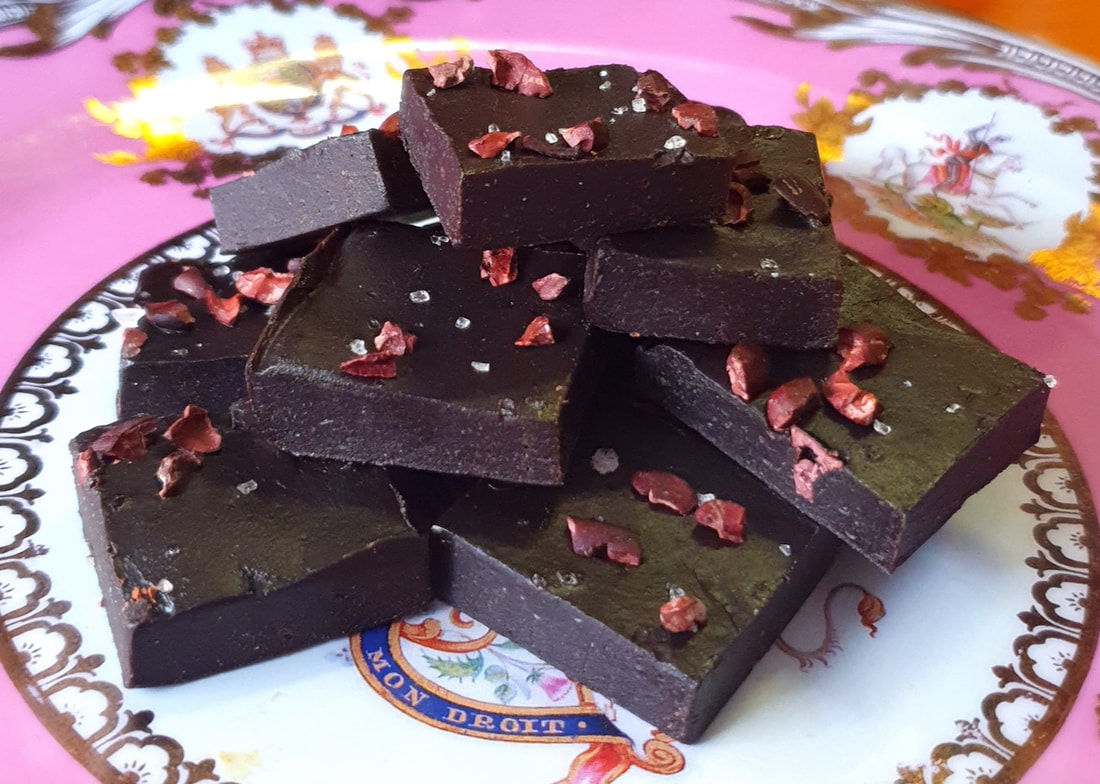
This no bake, no fuss treat is my weapon of choice when the afternoon or late night sugar cravings hit. Keep it in your freezer, and always be ready to slay the cravings beast! Ingredients:
2 tbl maple syrup* 1/2 cup hulled or unhulled tahini 2 tbl raw cacao or alkalised cocoa powder 2 tbl coconut oil, melted 1 tsp vanilla essence Method: Simply stir all ingredients together in a bowl. If the mixture feels too thick, add a tiny splash of water. Pour into in a lined container, or in silicone ice cube trays sprayed with a bit of oil. Its a blissfully thick and fudgy consistency so you'll need to press the mixture into corners, nooks and crannies. Pop in the freezer. They will be ready to eat in an hour. Cut into squares (or if you've used silicone molds, just pop them out). Scoff a couple then return the rest to the freezer in an airtight container. This fudge, like most raw, wholefood treats, needs to be kept in the freezer. They can be kept for up to 6 weeks. *use any sweetener you fancy: maple syrup, honey, rice syrup, even a handful of mashed dates PIMP MY RECIPE: You can add any flavours you like to the mix: A shot of coffee, some mint essence, orange zest & cardamom...go crazy! You can also sprinkle things on top. I like using cacao nibs and sea salt flakes.
0 Comments
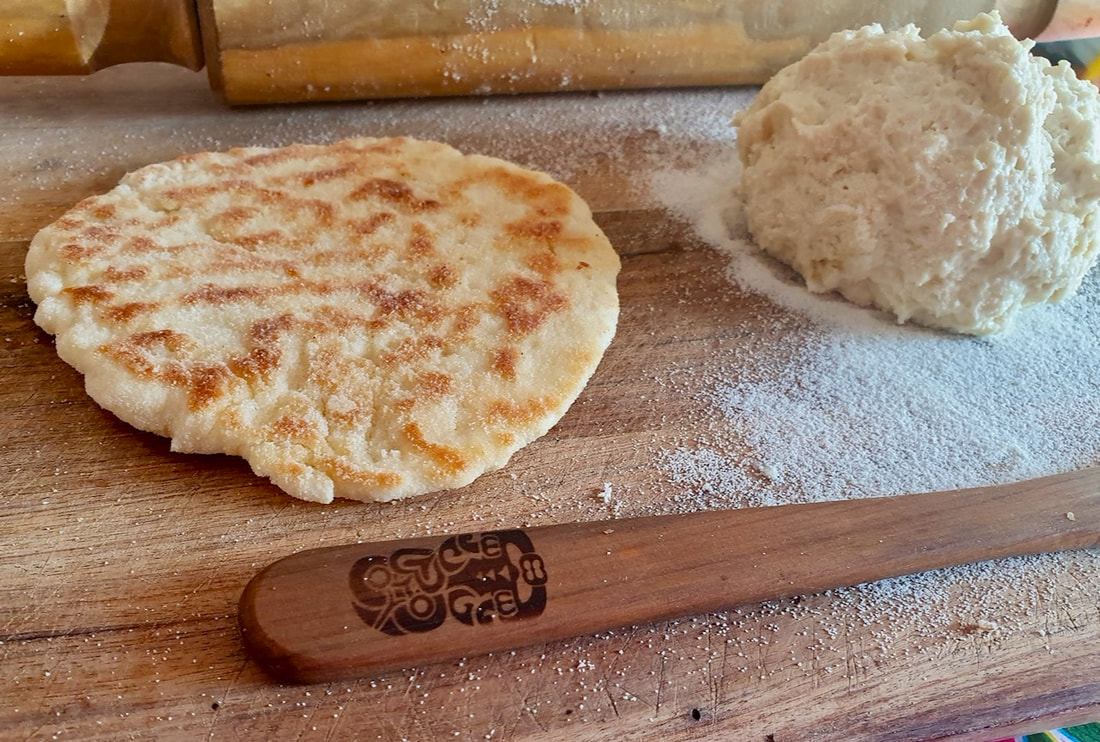
My 12yo heard about this most excellent recipe, which produces a stack of warm, fluffy flatbread in the same time it takes to cook a pot of rice. I often hand this job entirely to the 12yo to do. I just swoop in at the 11th hour to supervise the frying bit. Ingredients: 1 cup self raising flour (regular or gluten free)* ½ cup Greek yoghurt (coconut yoghurt and sour cream work also) Pinch salt (optional) Method: In a large mixing bowl, combine all ingredients and mix until combined - no kneading necessary! My kids like to use their hands for the mixing bit. Now look smugly at the big ball of dough you've made, and give it a pat :) Lightly flour a cutting board or kitchen surface. Sprinkle a little extra flour on the ball of dough, and transfer onto the floured surface. Press the ball of dough into a disc and cut into 6 even(ish) pieces. Use a rolling pin or an empty glass bottle to flatten each piece of dough til they're about 1cm thick and vaguely oblong or round. Heat a large, preferably non-stick frypan on medium heat. When hot, place a piece of naan in the dry pan and cook for about 2 minutes, before flipping and cooking for another minute. If desired, brush the tops of the naan bread with melted ghee, butter or oil. *If you don’t have self raising flour, the maths for making your own is pretty user friendly: 1 tsp baking powder to 1 cup plain flour. WAIT, WHAT DO I DO WITH THE LEFTOVERS? If you have leftover naan (lol, I've never experienced this phenomenon but you never know) you can refrigerate it or freeze it for later. Place the wrapped, sealed naan in the fridge or freezer, where they'll keep beautifully for 3 days in the fridge or 6 months in the freezer. To reheat, pop it in a dry, moderately hot pan (or sandwich press!) for a minute or 2 on each side. No need to defrost before reheating. PIMP MY RECIPE: Garlic Naan For Garlic Naan, drizzle cooked naan with garlic oil, or if using fresh garlic do the following: Fry the first side, flip it over and brush lightly with olive oil and sprinkle with about 1/4 tsp freshly minced garlic. Flip the garlic side of the naan onto the cooking surface for about 15 seconds (just until the garlic adheres to the naan. You don't want to burn the garlic.) Peshwari Naan When mixing your dough, add a handful of sultanas or raisins, some dessicated coconut and flaked almonds. Herb Naan Drizzle cooked naan with a little olive oil and chopped herbs, like coriander, mint and parsley. 
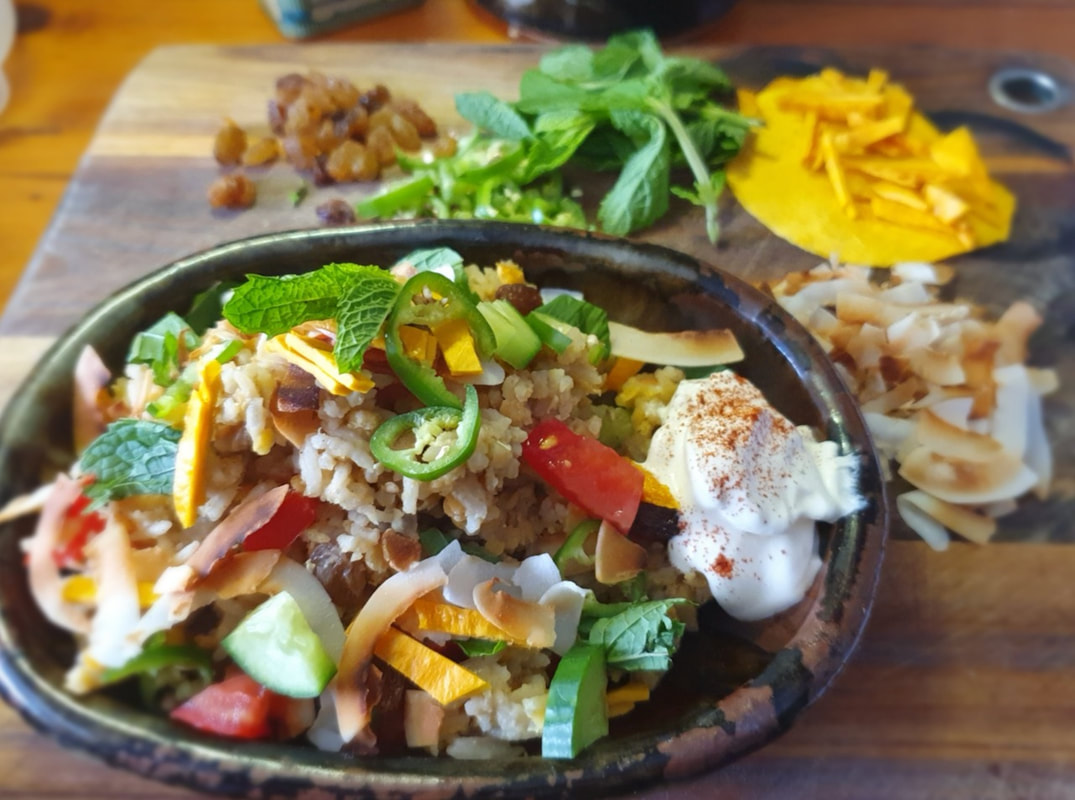
The idea for this dahl came to me on a sticky, 38°c summer day. The kids had requested dahl for dinner and the thought of a bowl of hot food didn't fill me with joy. I thought of ways I could rejig the ingredients and flavour profile of a traditional dahl to better suit both the weather as well us Sydneysiders' love of zesty flavours; casual meals that are simple, fresh and nourishing to boot. The result is a dish that ticks many important boxes: it's family friendly, costs only a few cents per serve, is simple and quick to prepare, and adaptable for different palates and weather. In the warmer months, serve this dish at room temp and garnish with coconut, mango, yoghurt and all things summer. In winter, add an extra cup or 2 of stock, serve hot and top with chutney for a soupy hug in a bowl. We hope you enjoy our adaptation of a family favourite!
Method:
In a large saucepan saute onion, garlic, ginger and spices in oil, on a low heat for 2-3 mins. Add water, salt, honey and rice. Bring to boil, reduce heat, add lentils, cover, simmer for 15 mins. Turn off heat but leave lid on a further 5 mins. At this point, check dahl for consistency - if it needs more water, add about ½ a cup, or more if you prefer a soupier dahl. Allow rice and lentil mixture to cool a little (aprox 20 mins) before tossing it gently in a serving bowl with the tomato and cucumber. Serve at room temperature with yoghurt and any of the suggested garnishes. To really add that special touch serve it with our super simple 2 Ingredient Naan Bread. |
Archives
March 2021
Categories
All
|