 Nothing says slow weekend mornings like a breakfast table laden with pancakes and all the trimmings. There is, however, just one niggling issue with them: it's not the greatest time for the person cooking them. Pancakes are best straight out of the pan, & you can generally only make one or two at a time. So the nominated pancake cook doles them out onto the plates of beaming and satisfied loved ones, who sit down to enjoy them while they're still steaming. The cook, on the other hand either eats theirs standing up or waits to the end to sit down and enjoy theirs. Those pancakes have the cook on a tight leash.
Enter Oven Pancakes. They go by a few names: Dutch Puff, Dutch babies, German pancakes, Bismarck, Hooligans and Hootenannies! Personally I would like to call them Freedom Pancakes because they free the cook - they're baked in the oven as one giant pancake before being sliced into portions and topped with whatever you fancy. If, instead of standing over the stove for 30 mins, you like the idea of sitting down to leisurely enjoy a cuppa while a delicious, high & light pancake bakes in the oven, then this is the recipe for you.
0 Comments
 Risotto is a classic crowd pleaser, but I think in recent years it's been wrongly tainted with the ‘difficult’ brush. We've seen it break aspiring supercooks on reality shows, and judges on these shows talk solemnly about the ‘risotto curse’, advising contestants to think carefully before attempting it.
But honestly, if you're not serving it at a fine dining restaurant, getting the consistency of a risotto exactly right just doesn't matter or affect the enjoyment of it at all. I'm of the firm opinion that a good-enough risotto is still utterly delicious. The babysitting that cooking a risotto requires is a different story - when it comes to mid-week dinners most of us are after more of a set-and-forget recipe. What if you could skip the stovetop stirring, pass most of the work to your oven and still produce a delicious risotto? Our ‘cheat's’ risotto is just that. It's been well and truly tested and tweaked. Hands-on time is just 15 minutes! It requires a small number of ingredients, yet the flavour is nuanced and delicious. All you need is a lemon, a few sprigs of rosemary and a little parmesan. Enjoy it as a stand-alone dish or use it as an accompaniment to the main event. We hope you love this creamy, luxurious feeling classic with a shortcut twist!  For the first recipe of Winter 2024 I wanted to make a soup. Something versatile that most of us could produce with a quick pantry raid.
And so we give you Tuscan Bean & Barley Soup. It's my spin on a classic White Bean Soup & involves a variety of dried beans and some pearled barley. It's a versatile recipe with wiggle room to incorporate the beans and grains you have on hand in whatever ratio you fancy. The only caveat would be to stick to beans that hold their shape when cooked and don’t get too mushy. The reason this recipe works is because even though different beans and grains I use need different cooking times, the ones that cook the quickest don’t dissolve into the soup by the time the slower cooking pulses are done. This is such a gloriously comforting soup. We look forward to you trying it out - let us know how it goes!  There's quite a chasm between the sudden hankering for cake and baking one. A chasm consisting of finding a recipe, checking you have ingredients to hand, deciphering the recipe and summoning the motivation to tackle the various techniques and steps (my mum says that for her the most dreaded sentence in any recipe is ‘cream the butter and sugar’ to which she always answers “no. I will not be doing that” before slamming the cookbook shut.) Too often you might find yourself making do with nibbling on some cooking chocolate instead.
What if I told you that you could make a delicious cake without much bother? 15 minutes hands on at most. No creaming butter and sugar. A cake whose recipe is essentially distilled down to 2 steps. A cake that is so forgiving that if you undercook it, you're left with blissfully rich and gooey fondant in the centre of the cake. And if you overcook it, the middle stays miraculously decadent while the outside develops a delicious crunch. Still on the fence? Look at my photo of the cake. See all those pretty hazelnuts and toffee shards? That's not because I'm fancy, it's because the entire middle of my cake collapsed 25 mins into baking, leaving a solid rim around the perimeter. My cake resembled a crater volcano. This could've been caused by several things. However, it was still delicious, and it didn't look or taste like a mistake at all! In a nutshell it's this: separate egg whites and yolks. Mix the yolks with all the other ingredients, then whip the egg whites and fold it into the cake batter before baking for about 40 mins. Try it. It will become a family favourite, I guarantee. 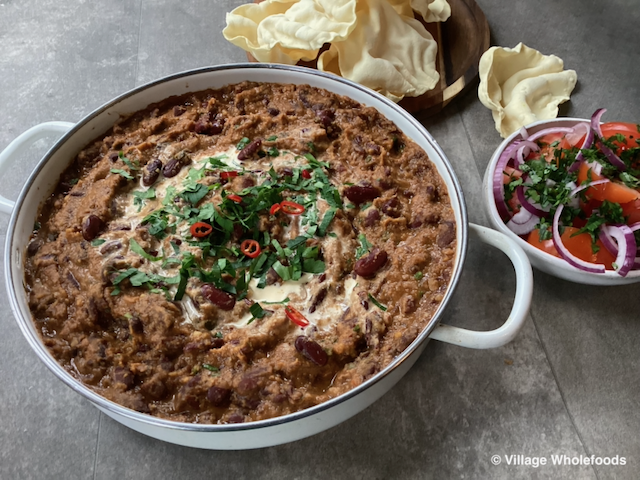 “I miss my mother’s rajma” one of our regular customers lamented a while back while scooping kidney beans into a bag. We nodded sagely for a second then dropped the pretence that we knew what he was talking about. We realised there was a very good chance that he was talking about a delicious dish made by his Northern Indian mum, and that if we played our cards right he might share the recipe with us.
“Rajma” he said dreamily. “It’s a curry made with kidney beans . But it’s so much more than that. It can’t be explained. You just have to taste it”. He didn’t know his mother’s exact recipe but he pointed us in the right direction. Suzanne was on the case, and by the end of the week had produced a pot of Rajma. Not wanting to be left out, I made it the following day and we had a rajma-off. Suzanne won! How to explain rajma… it’s rich, bright, creamy sauce is reminiscent of butter chicken, and the kidney beans give it a comforting, velvety texture. It’s delicious, and we couldn’t wait to share it with you. |
Categories
All
Archives
January 2024
|
 RSS Feed